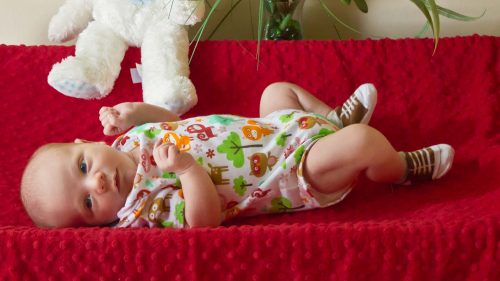
 There's a new baby in town and you want to make them something special. How about making them a handmade baby onesie? How fun would it be to be able to choose your own fabric. Plus, this project is quick and easy. After you finish, you'll be inspired to make another, because a newborn can't have too many new onesies. Along with our step by step tutorial, we also provide you with a free pattern. Please note, the size of this pattern is newborn but you can always adjust it for other sizes as well. Also, be sure to use knit fabric as it's important to be stretchy and that you prewash your fabric before cutting out your fabric. For an extra professional looking detail, we show you how to add individual snaps. Are you ready to make a newborn baby onesie now? Let's do it!
169 thoughts on “Newborn Baby Onesie”
Leave a Reply
You must be logged in to post a comment.


I think our sizing is a bit different here in the US. but from what I read, I think it would correlate to 000. I think newborn here is typically 0-3 months.
What size would this make? 000?
love the instructor
Hi there–I had very stretchy jersey fabric, and did the stay stitching around the neckline and then the straight stitch to attach the binding, before using the exact stitch you showed to finish the binding…and now it’s not stretchy at all! I had a feeling two rows of straight stitches would negate any stretch in the fabric and the zigzag…is that how it’s supposed to be? How do you squeeze the baby’s head through? Do you really need the stay stitching? Could I attach the binding with a stretch stitch instead? Confused. Thanks.
Thank you again! I added a picture of the onesie to my account; maybe you could look at the sleeves and let me know what I did wrong;) . Thank you :).
Thank you so much for the reply:). I could not figure out how to do it without an unfinished edge , so I hemmed the cap of the sleeve before sewing. I am probably doing something wrong but I just did not like the edge being on top and having a raw edge. It looks cute now that the caps of the sleeves are hemmed :). I was trying to see on your example if they were the same way, and I think they are. Thank you for offering this free pattern:). It would be great , if in the future, you could do another video showing you sew the sleeve on and how it looks after it is sewed on ;). Thank you for the pattern, the onesie is really cute !
thank you so much for the kind words! I’m so glad you’re enjoying our tutorials 🙂
You’re basically just sewing the cap of the sleeve to the armhole. then sewing the underarm seam and side seam together in one stitch. Everything gets stitched right side to side. Hope that helps.
Hi :), thank you so much for this pattern and video instructions . However, I am having a hard time with the sleeves , after they are pinned and sewed, do you flip them out then sew the sides? I think that is what to do, just checking. I have tried a few other ways and it comes out looking wrong. Thank you !
You are an awesome teacher! You’re videos are so very clear and concise! I not only learned how to make a onsie, but also learned binding, the correct stitch to use for applying, and solved the mystery of how snaps are applied to garments! I know this may seem silly to some, but I’ve never seen a snap application! I’m in love with your videos and website! Thank you and as soon as I have more time for seeing, I plan on becoming a premium member! Merry Christmas and Happy New Year, Darling! (Yes, I’m a Southern Girl)