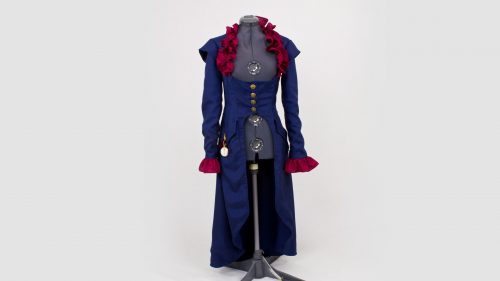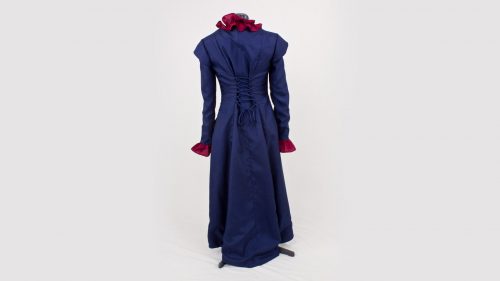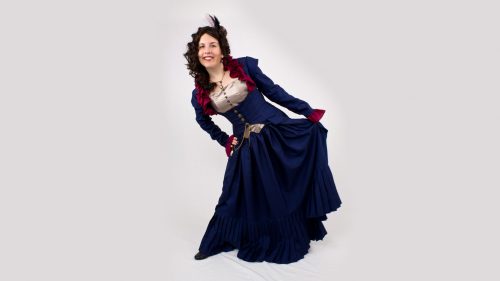

 I love the Simplicity 2172 Steampunk dress and I think what really pulls this whole ensemble together is the coat. It's cute with just the bustier, but add the coat and you have added the wow. It's definitely an unique coat that is short in the front, with just a panel going over the torso, and then it's long, almost floor length, in the back. I also like the contrasting ruffles that go around the neckline and the sleeves. It's a piece of the ensemble that adds layers, complexity and is just plain cool looking. I also like that it has the ties in the back so you can cinch it up to make it more form fitting. It definitely gives this steampunk outfit an air of the Victorian in its elegance. I think a fun part is accessorizing the coat in the end. We just go over the sewing steps in this tutorial, but the Simplicity directions easily show you how you can add chains like they did.
This coat is part of our Simplicity Pattern 2172 steampunk series. We also have tutorials on the bustier and skirt, so you can easily create this whole steampunk ensemble.


You have no idea how helpful the videos are for this pattern. I’m a beginning sewer and I have learned so much from you! I can’t thank you enough. I do have a question about the coat pattern (although I haven’t cut out pieces or anything yet), do you think the sleeves would be long enough if you left off the ruffles?
you’re correct as this pattern is a little different and a little more complicating. I took a look at the pattern pieces again and it doesn’t have a waistline marked but what I do notice (on pieces 3, 7, and 10), about 1″ below double lines is an area where the pattern on the side seam goes in like a curve indentation. (And I would adjust all those patterns since they all make up the side seam area) Just looking at it, I would say this is where the natural waistline is and where I would make the increase. The pattern envelope states that the hipline is 9″ below the waistline so you can use that as your guideline. Also, it does say on the pattern piece that the finished measurements are 4″ larger than the body measurements for ease. So it does give you a little bit of wiggle room probably because they assume the tie in the back of the jacket will be used to give a more fitted look and can be adjusted. I do suggest making a test run of the jacket with cheap muslin just so you can make sure any adjustments you make are going to work. Good luck!
Thank you SO much for uploading this how to it’s really helpful. I’m in the process of making this jacket but I need to increase the waist. I have watched your video on how to do this with the pivot but I’m getting confused as this pattern doesn’t have a separate bodice and skirt piece like shown in the video.
Should I use the marked waist line on the pattern as the bottom of the bodice and pivot from my seam allowance to there? or measure out my hip line and pivot to there?
Thanks for you help 🙂
Yes! I’ll post some as soon as I finish the 2172 skirt. I’m putting the finishing touches on today.
yay! so glad we were able to help. We’d love to see a picture of how yours turned out. 🙂
Hello!
Thank you so much for making these videos. Reading the directions is like learning a new language. I just finished making this coat and I absolutely love it! I really appreciate all the details you put in the videos and how you go step by step.
I reread the directions and I can’t think of a plausible reason why not. I say go for it! Send me a picture when you finish 🙂
I’m learning to sew, and you’ve taught me a TON by watching so many of your videos. I’m really excited to keep watching them. This steampunk series reminds me of the many costumes my mother used to make for us every Halloween. Such great stuff!
wow! I can’t wait to see yours. I know I’m going to be wearing mine this Halloween too. 🙂
I just purchased pattern fabric and notions and am sew excited. Not my usual halloween ghost costume this year 😀